Post Time: 2025-07-18
A blood sugar monitor kit, also known as a glucose meter kit, is an essential tool for individuals managing diabetes or those needing to monitor their blood glucose levels for other health reasons. Understanding how to properly use this kit is critical for accurate readings and effective management of your health. This article will provide a comprehensive guide on how to use a blood sugar monitor kit, ensuring you feel confident and knowledgeable in performing this important task. Accurate and consistent monitoring is the key to preventing severe health complications arising from uncontrolled blood sugar levels, such as heart problems, nerve damage, or even blindness.
Why Is It Important To Monitor Your Blood Sugar?
Regular blood glucose monitoring offers numerous benefits, particularly for people with diabetes. Some key advantages include:
- Informed Decision Making: Knowing your blood sugar levels allows you to make more informed decisions about diet, exercise, and medication. This can help in preventing dangerous highs and lows in your blood sugar.
- Effective Diabetes Management: Monitoring helps you understand how various factors like food, physical activity, and stress affect your glucose levels, which is essential for effective diabetes management.
- Personalized Treatment Plans: The data obtained from monitoring can be used to create tailored treatment plans, optimizing the effectiveness of your healthcare routine.
- Early Detection of Changes: Regular monitoring allows you to catch changes in blood glucose levels early, before they escalate to dangerous situations, such as diabetic ketoacidosis or hypoglycemic shock.
- Prevention of Complications: Consistent monitoring can significantly contribute to preventing complications related to diabetes, improving overall health and quality of life.
The Essential Components of a Blood Sugar Monitor Kit
A typical blood sugar monitor kit usually comprises several key components, each with its specific purpose. Understanding what each component does is the first step in using the kit correctly:
| Component | Function |
|---|---|
| Glucose Meter | The device that reads the blood glucose level from the test strip. |
| Test Strips | Single-use strips that contain chemicals that react with glucose in the blood to measure it. |
| Lancet Device (Lancing Device) | A device holding a small needle that pricks the skin to obtain a blood sample. |
| Lancets | Single-use needles that fit into the lancing device, to make the pricking operation safe and precise. |
| Control Solution (sometimes) | A liquid used to check the meter and test strips are functioning correctly. |
| Logbook or App | A tool to record your readings and related information, for a deeper understanding of trends and patterns. |
| Carrying Case | Useful to protect and easily transport the kit. |
Step-by-Step Guide on Using a Blood Sugar Monitor Kit
Using a blood sugar monitor kit involves several steps. Here is a comprehensive guide to help you do it safely and effectively:
1. Preparation Is Key
Before starting, make sure you have everything ready. This involves ensuring that the device is working, your hands are clean and your mindset is aligned with the objective of taking a reading accurately.
- Gather Your Supplies: Ensure you have your glucose meter, test strips, lancet device, lancets, and alcohol wipes or soap and water for cleaning. A clean paper towel or a sterile gauze is also helpful in case you have excess bleeding.
- Check Expiration Dates: Make sure that your test strips and control solutions are not expired. Expired materials may lead to inaccurate results.
- Wash Your Hands: Thoroughly wash your hands with soap and warm water. Ensure you dry them well to avoid any diluting effect on your blood. If soap and water is unavailable, use an alcohol wipe on your chosen fingertip.
- Prepare the Lancing Device: Insert a new lancet into the lancing device, following the manufacturer’s instructions, adjusting the depth setting for comfort.
- Insert a Test Strip: Insert a new test strip into the glucose meter, ensuring it is properly inserted and ready to read the blood sample. Your meter will automatically power on if it doesn’t have a manual power button.
2. Performing the Test
Now that you have everything ready, let's move on to the procedure of obtaining your blood sugar reading.
- Prick Your Finger: Choose the side of your fingertip, which has fewer nerve endings than the pad, for a more comfortable testing experience. Gently press the lancet device against the chosen spot and press the trigger to prick your finger.
- Obtain a Blood Drop: Gently massage or squeeze your finger from the base towards the fingertip to encourage a drop of blood. The amount of blood needed is small, typically the size of a small droplet (the manufacturer of your specific meter will have specific instructions as to this). If blood flow is slow, make sure the point you have chosen is not too dry or calloused and gently wipe the area to encourage blood to flow. If needed, re-prick with a new lancet and try an alternative finger. Avoid excessively squeezing as this can distort the reading results.
- Apply Blood to the Test Strip: Bring the blood droplet to the test strip on the meter without smearing. Be sure that the strip fills fully, that is, the side of the test strip takes in the amount of blood that the manufacturer’s instructions state.
- Read the Result: The meter will provide your blood glucose reading after a short waiting period. Record the results in a logbook or app along with the date, time and any factors, like food, medicine or exercise, that may affect your reading, such as the time since your last meal.
3. Post-Testing Procedure
Once you've got your reading, it is essential to handle the used items with care. This is to avoid infections and to ensure correct use of the kit for the future.
- Discard Used Lancets Safely: Immediately place the used lancet in a sharps container or a hard plastic container with a lid. Never reuse lancets as they are only meant for single use.
- Clean the Area: Use a clean gauze or a cotton ball to apply gentle pressure to the pricked area. Bleeding is minimal and the area is typically healed within minutes.
- Proper Storage of Your Kit: Store all the components of your blood glucose meter kit in a cool, dry place, away from direct sunlight, children, and pets. Following the kit’s instructions on storage can prevent damage and keep your devices performing optimally.
- Clean the Meter: Wipe down your meter regularly with a damp cloth. Never submerge it in water.
Tips for Accurate Readings and Common Mistakes to Avoid
To get the most accurate readings, you need to understand the important aspects of the process and be consistent with your method. Let's take a look at some common errors and important recommendations.
Tips for Accurate Readings
- Use Fresh Test Strips: Make sure your strips are not expired and have been properly stored. They can be damaged if they are left out in the air or exposed to heat and light.
- Code Your Meter: Some meters require that you input the code of your test strip when you open a new box. This code should be displayed on the container, and also on the screen of the device. The calibration code can vary by manufacturing batch. Make sure you are coding your meter every time you open a new container of test strips.
- Calibrate: Some glucose meter kits need periodic calibration using control solutions to verify that it is giving accurate results. Refer to the manufacturer’s instructions on how to perform this process.
- Use an Adequate Blood Sample: Ensure you get enough blood for the test strip. Insufficient blood may lead to inaccurate results, as can applying excess blood. Be consistent in this process to ensure accurate, comparative readings.
- Test at consistent times: Ideally, you want to use the same finger for testing each time and test at consistent time periods, so that you can build accurate data to use when making important decisions on your nutrition and exercise routines.
- Regular Maintenance: Periodically check your meter for any damage or loose parts. Proper cleaning, when needed, will help you keep the meter performing accurately and consistently.
- Store Properly: When not in use, make sure to store all your supplies in the storage case provided, away from the elements and children or pets.
Common Mistakes to Avoid
- Reusing Lancets: Always use a new lancet for each test. Reusing them can dull the point and be a potential source of infection.
- Squeezing the Finger Too Hard: Excessive squeezing can dilute the blood sample, leading to false readings. It is important to apply a gentle pressure from the base of the finger towards the tip, avoiding too much force.
- Ignoring Control Solution Tests: Regularly test your meter using control solutions to ensure accuracy. These solutions allow you to perform a self-assessment and check that the meter is working as designed.
- Using Dirty Hands: Avoid touching the test strip, finger prick or blood with dirty or unwashed hands.
- Testing too soon after showering: After bathing or showering, the skin tends to be more hydrated, which may alter the results. Wait a few minutes before testing your glucose after coming from a hot shower.
- Ignoring Trends: It’s important to track blood glucose levels and not just look at individual readings, as data over time can give you a better indication of the effect of food, exercise and medicine on your glucose levels. Recording these and using the logbook or app is an essential tool to understand the trends and fluctuations in your blood sugar readings.
How to Troubleshoot Common Issues
Even with careful usage, you might encounter issues when using your blood glucose monitor kit. Here's how to troubleshoot some common problems:
| Problem | Possible Cause(s) | Solution |
|---|---|---|
| Error message on the meter | Test strip not inserted correctly or damaged | Remove and re-insert strip; Use new strip if damaged |
| Meter won’t turn on | Dead battery or not configured properly | Replace battery or check power connection or settings according to manufacturer’s instructions |
| Blood won't flow | Lancets with shallow settings, too dry a location for puncture | Adjust lancet setting or prick a different location; Re-prick or use new lancet to try again. |
| Inaccurate readings | Expired or damaged test strips; Too much blood or not enough; Dirty hands | Use new strips; Use sufficient blood; Ensure hands are washed. Use the Control Solution to test the device itself before taking readings using fresh strips and a new prick. |
By understanding how to use a blood sugar monitor kit correctly and following these guidelines, you can manage your blood glucose levels effectively and lead a healthier life. Regularly consult with your healthcare provider for any health concerns and follow their guidance regarding your blood glucose control and overall health care management. Consistent, accurate monitoring is a key element in staying healthy.
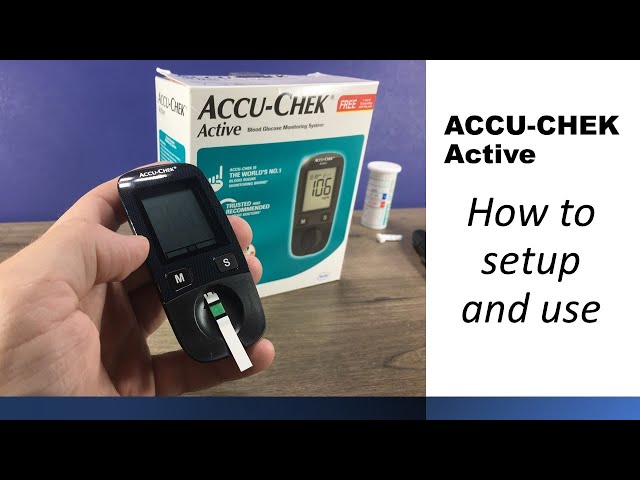
Instructions how to setup and use the ACCU-CHEK Active blood glucose Meter Steps passed out low blood sugar covered prepare lancet device 0:42 set date and time 2:06 Test Blood 5.5 fasting blood sugar Sugar 3:22 Remove lancet 4:44 how to get rid of low blood sugar